- NoSmoke 自动冒烟遍历器
- 1. NoSmoke 的优势:
- 2. How it works?
- 3. Why the name?
- 4. 功能
- 4.1 跨平台
- For Android
- For iOS
- For PC-Web
- 4.2 可配置
- 4.3 可插庄
- 4.1 跨平台
- 5. 设置
- 5.1. 依赖声明:
- 5.2. 运行:
- Step 1. 安装:
- Step 2. 运行:
NoSmoke 自动冒烟遍历器
一款跨平台的UI 自动化遍历测试工具,全套文档请见 wiki
1. NoSmoke 的优势:
- 自动化UI 遍历 成本低廉
- 高精度测试 DFS 算法
- 跨平台支持 iOS,安卓,以及PC Web!! :]
- 测试结果可视化 见 Macaca-Reporter
2. How it works?

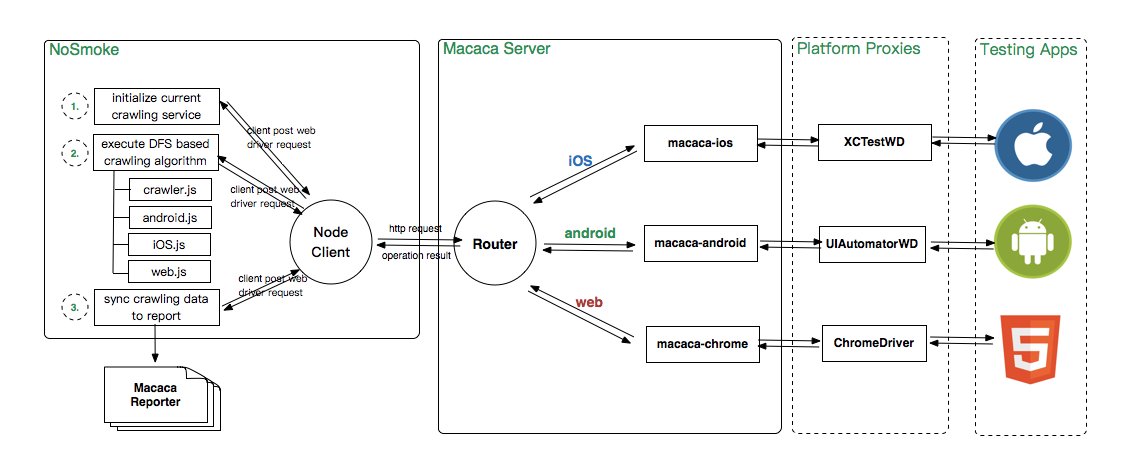
Platform Proxies: 安装在各类终端的测试驱动程序,负责建立与Macaca Server 的socket 通讯端口, 并在内部根据各个平台提供的UI 测试框架 封装 WebDriver 测试协议, 便于Macaca Server 层统一通过WebDriver 协议发送测试请求指令. iOS Swift 版XCUITest 驱动: XCTestWDandroid UIAutomator 驱动: UIAutomatorWD
Macaca Server: 安装Macaca 服务层, 通过cli 工具提供对外命令指令集, 内部封装了各个平台对应的请求发送器: macaca-ios, macaca-android, macaca-chrome macaca-ios 封装: macaca-iosmacaca-android 封装: macaca-android
NoSmoke: 负责初始化Macaca 服务以及代理层对应端的驱动程序, 内部提供一个 client 与 macaca server 进行通讯, 通讯协议遵守 WebDriver 规范; 初始化完毕后开始按照深度遍历算法, 结合android, ios ,以及web 各平台的特性对当前界面进行抓取, 分解界面可操作的基本元素后, 通过client 与router 进行交互, 发出操作指令,并进一步分解刷新后的界面.
3. Why the name?
Since all the good ones are taken, NoSmoke comes from the ideas across smoke testing, but smoke is not good for health …
4. 功能
4.1 跨平台
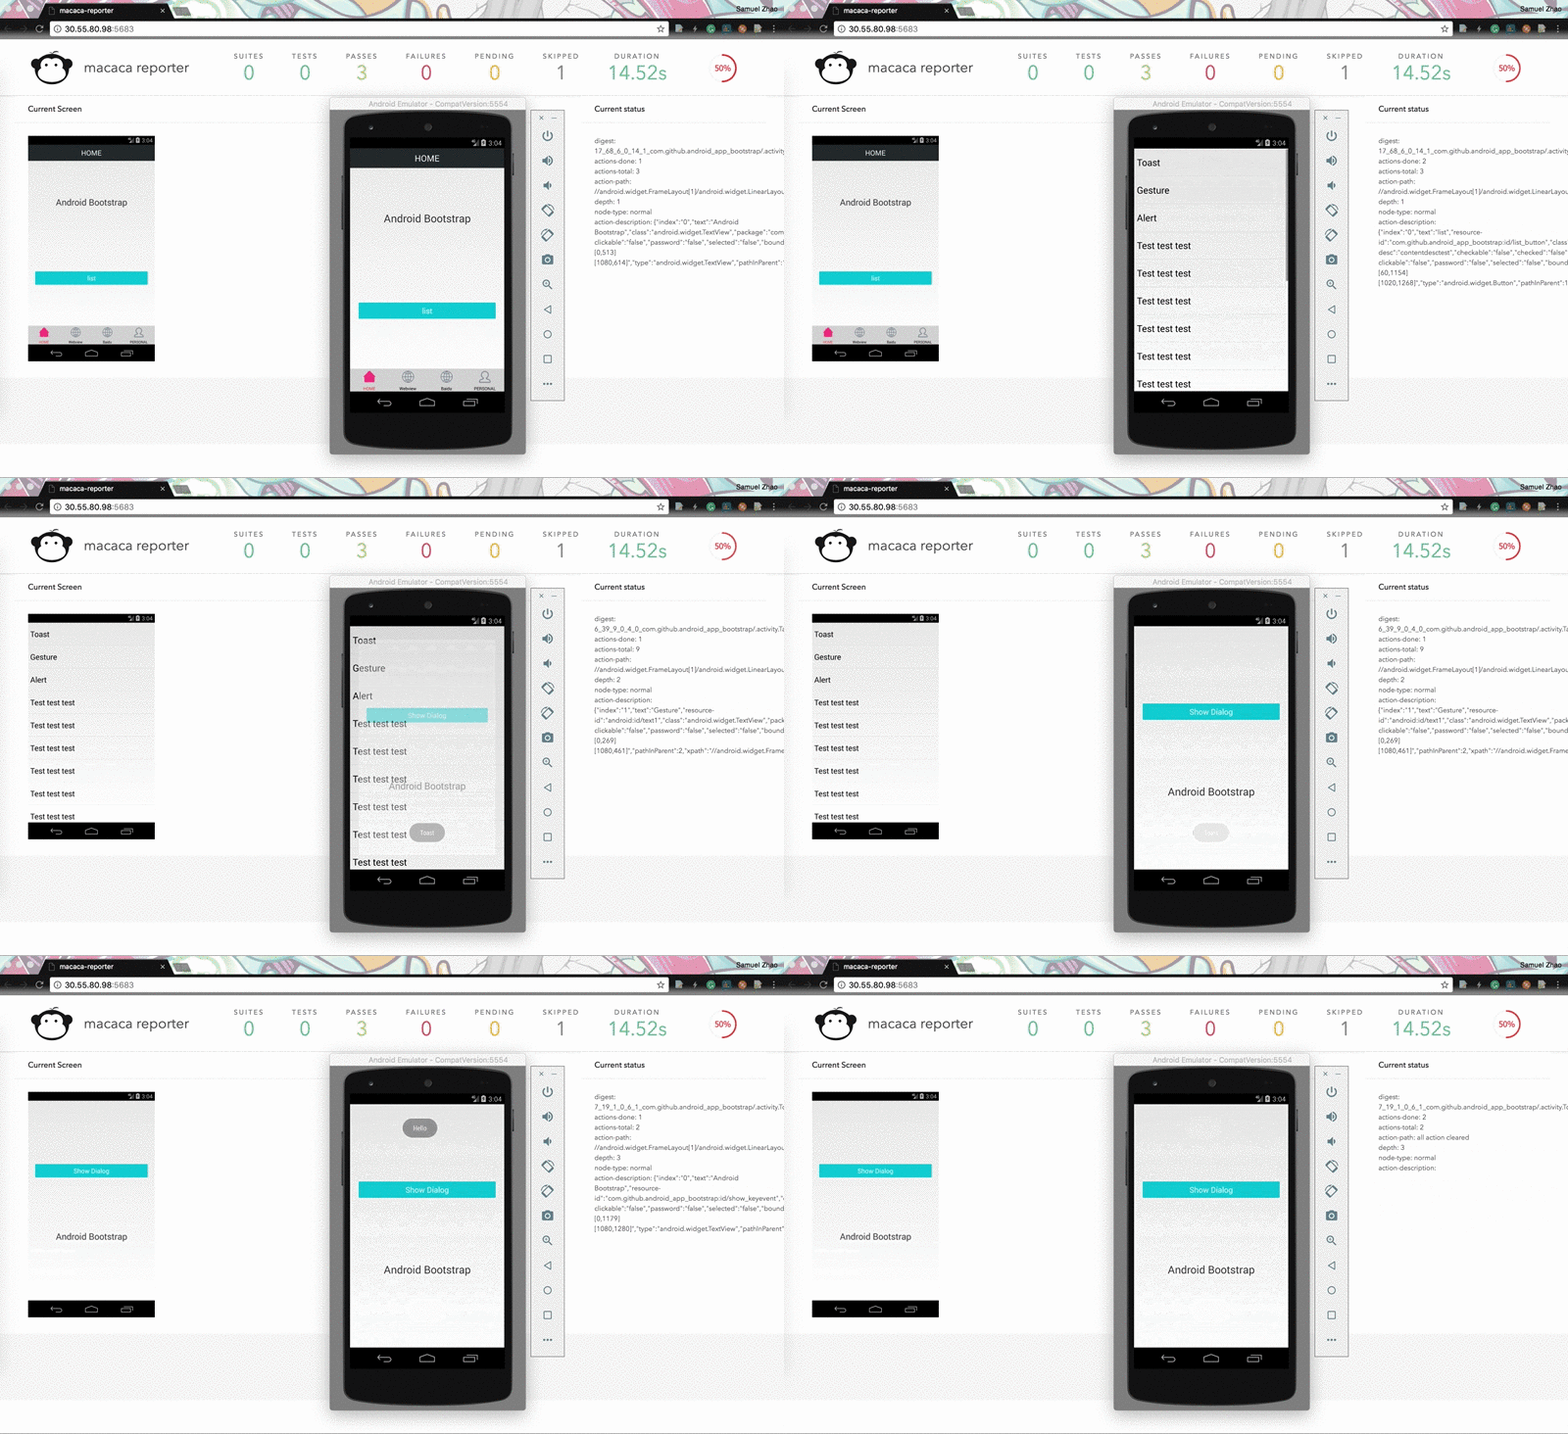
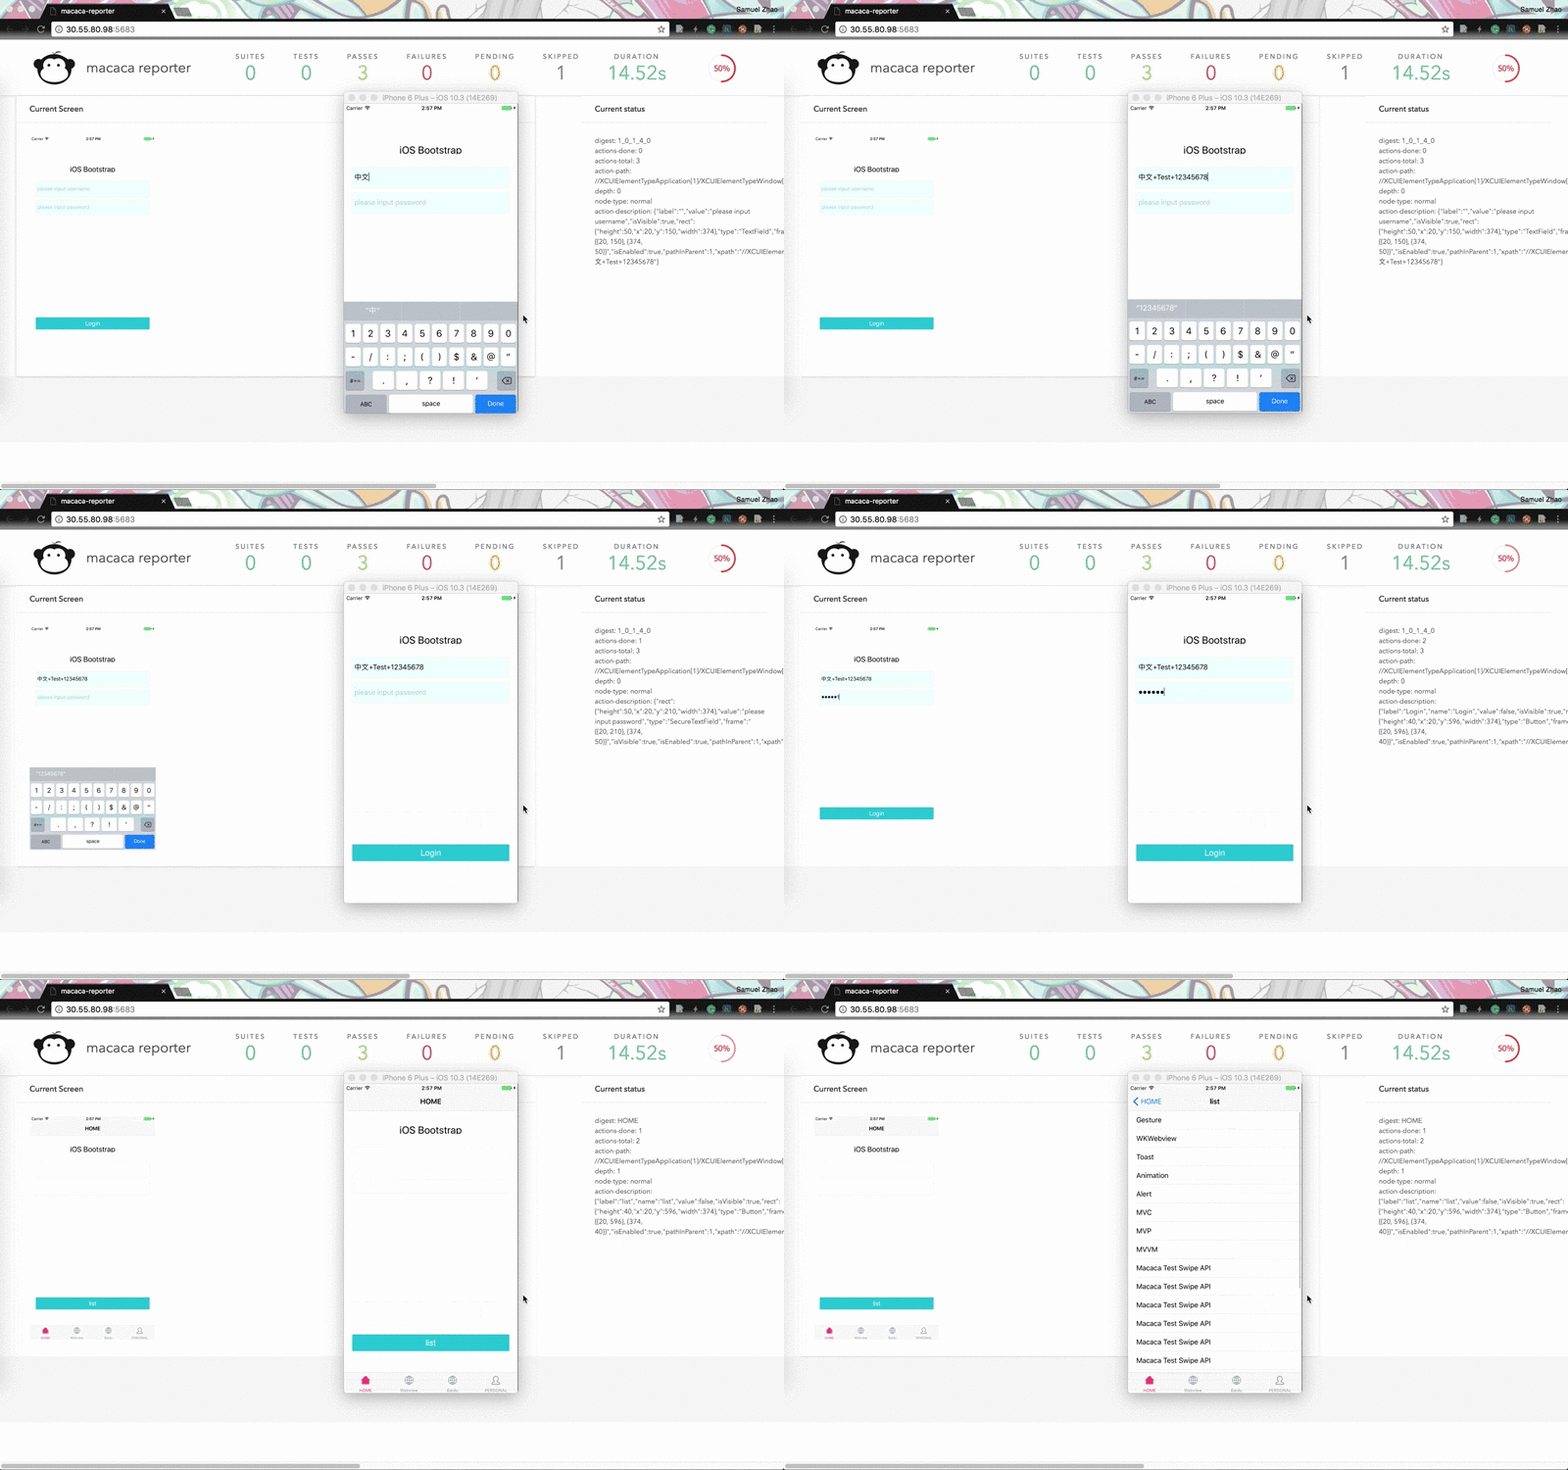
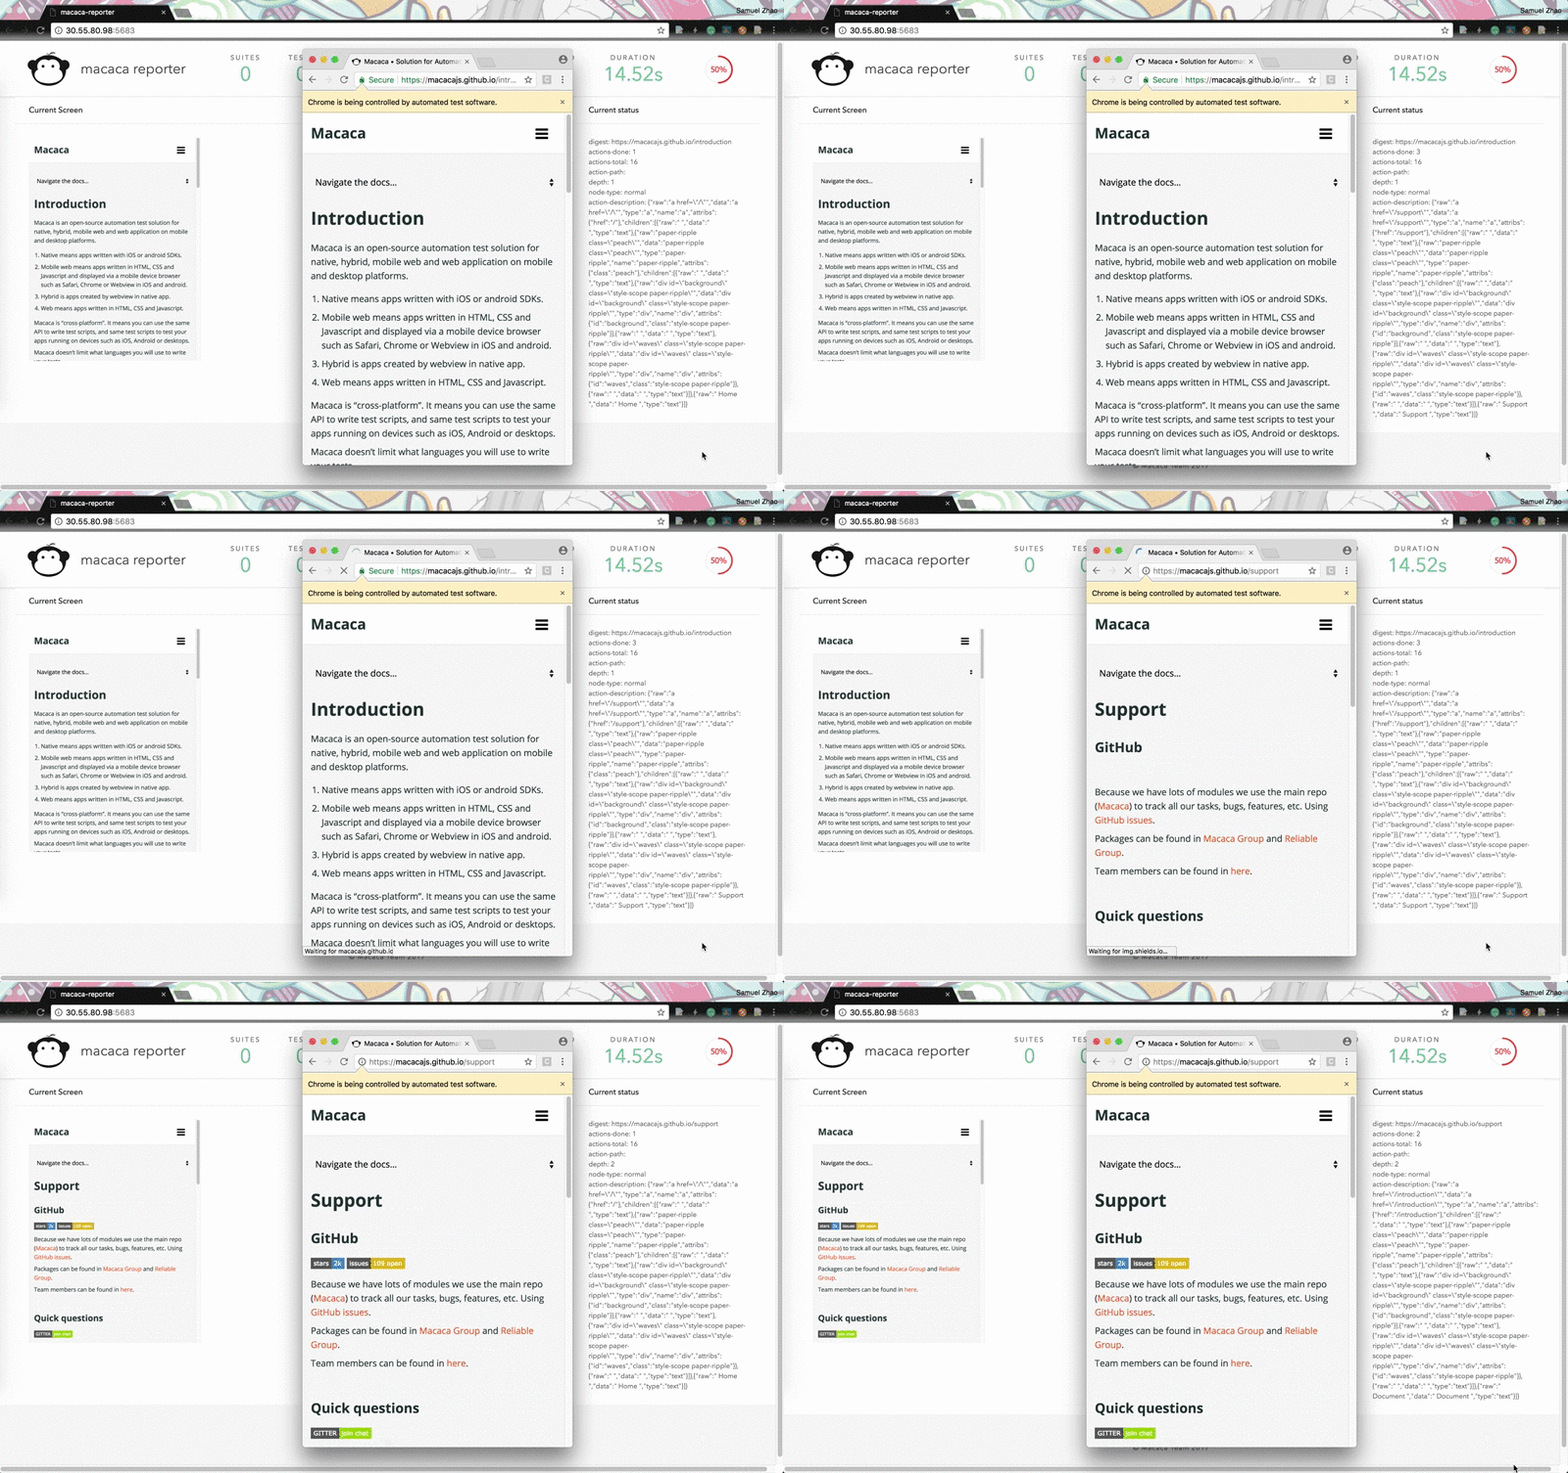
同时支持 iOS, Android and PC Web, macaca-reporter 的测试, 测试结果可通过macaca-reporter 收集
For Android

For iOS

For PC-Web

4.2 可配置
配置能力可见 这里, 同时提供各个平台运行的模版
4.3 可插庄
插庄说明以及模版见 这里
5. 设置
5.1. 依赖声明:
- iOS simulator 11.0 and xcode 9.0 and above.
- Android 6.0 and above, supporting both device and simulator. For real device testing please install null-keyboard
Note 可在5.2 后执行一下命令检查依赖是否正确安装:
$ npm i macaca-cli -g$ macaca doctor
5.2. 运行:
Step 1. 安装:
所有依赖的安装:
$ npm i macaca-android -g$ npm i macaca-ios -g$ npm i macaca-cli -g$ npm i macaca-electron -g
一键安装nosmoke:
$ npm i nosmoke -g
Step 2. 运行:
在工作路径,运行一下指令
# initialize macaca servermacaca server --verbose &# initialize nosmokenosmoke
Note: nosmoke 提供了详细的运行参数说明,请见: nosmoke —help Note: 单独执行nosmoke 不带其他参数只会启动默认的demo app, 运行特定的app 需要提供配置文件, nosmoke -c ‘配置文件地址’
更多信息, 请访问 macacajs/NoSmoke
原文: https://macacajs.github.io/zh/nosmoke
